Setting up NextCloud on Digital Ocean

For some time already I was looking for a cloud solution that I could replace BigTech’s options. And a cousin have suggested me NextCloud.

I just installed it in a Digital Ocean VPS and started my tests. For the record the best references I found about the installation process so far:

https://wiki.learnlinux.tv/index.php/Nextcloud_-_Complete_Setup_Guide

Setting a second user up: https://www.youtube.com/watch?v=g68wuUrrRMs


Usability tests with Selenium – Install

Usability tests are very important to single page applications (SPA), so I am gonna write some tutorials about Selenium, which is a test application suite for web apps.

First things first. Let’s see how to install Selenium in Ubuntu Linux environment. Most steps will be the same for Mac and Windows, since I will make use of PIP/python. If you use Windows, you will need to install python first. Check python.org for that.

1- Installing Pip:

Open your Terminal, and download get-pip script with curl.

curl -O https://bootstrap.pypa.io/get-pip.py

Then run the script. Obs: If you run the script with the –user flag, pip will be installed only for your current user, in .local/bin folder.

python get-pip.py --user

The output will look like this:

Collecting pip
	Downloading pip-8.1.2-py2.py3-none-any.whl (1.2MB)
Collecting setuptools
	Downloading setuptools-26.1.1-py2.py3-none-any.whl (464kB)
Collecting wheel
	Downloading wheel-0.29.0-py2.py3-none-any.whl (66kB)
Installing collected packages: pip, setuptools, wheel Successfully installed pip setuptools wheel

After this installation, we need to add the .local/bin folder to the PATH environment variable. You can use the .profile or .bashrc files. I like nano, so in Terminal (Obs: in Mac I would to use .profile):

nano ~/.bashrc

At the very last line of the file I add:

export PATH=~/.local/bin:$PATH

In case you don’t know, this command will add your local folder .local/bin to the existing PATH variable. From now on, every time you type a command in the Terminal, the system will look into the binaries located in .local/bin to see if the executable file is in there to run it. And that is the case with PIP, the pip command is in this folder. Save the file. Now reload the PATH typing:

source ~/.bashrc

If everything is right type:

pip -v

If the help appears you did everything right! 🙂

2- Now we Install Selenium.

I like the –user to keep the installation files only in the user folder. The -U flag, will also update the pip directory:

pip install -U selenium --user

After installing Selenium you need to install the WebDrivers interface for your desired Browser. I use mostly Chrome for development, so my example will be to download and install Chrome driver, but the steps are the same for all other browser. At the end of the post, you will find helpful links to download the other drivers.

2.1- Get your driver interface.

For Chrome we can go to the https://sites.google.com/a/chromium.org/chromedriver/downloads and download the most recent release. It will be a zip package. You can unzip it, and place that executable file where ever you want in your system, as far as the destination is listed in the PATH. I added my at the same .local/bin folder where pip is also located. As the name suggests that folder is meant to hold executable files anyway.

Once you place this executable files in a right place, you are good to go!

3- Let’s test.

Run the first test in the python console! In Terminal just call:

python

And there try the following:

from selenium import webdriver

browser = webdriver.Chrome()
browser.get('http://google.com')

When you set the browser variable, a Chrome window will pop up. Don’t worry! It is exactly what we want! The command get() will make the Chrome window to access Google’s page!

Perfect! We did the first step. Now we can control a browser page through script, and now we can automate our usability tests.

Next posts more about how to do it.

REFERENCES:

http://docs.aws.amazon.com/elasticbeanstalk/latest/dg/eb-cli3-install-linux.html

https://www.rosehosting.com/blog/how-to-install-pip-on-ubuntu-16-04/

https://pypi.python.org/pypi/selenium

https://docs.python.org/3/library/unittest.html

unittest introduction

http://docs.python-guide.org/en/latest/writing/tests/

https://jeffknupp.com/blog/2013/12/09/improve-your-python-understanding-unit-testing/

http://www.seleniumhq.org/docs/03_webdriver.jsp


WEBDRIVERS INTERFACES:

Chrome: https://sites.google.com/a/chromium.org/chromedriver/downloads

Firefox: https://github.com/mozilla/geckodriver/releases

Safari: https://webkit.org/blog/6900/webdriver-support-in-safari-10/

Edge: https://developer.microsoft.com/en-us/microsoft-edge/tools/webdriver/


Youtube:

Browser elements & Operations: https://youtu.be/ph3NJm4Z7m4?t=21m31s

Selenium Methods and Functions: https://youtu.be/ph3NJm4Z7m4?t=32m1s


Blender – script for rendering

After a long time without any posts, here we go. 🙂

I am working with Python scripts in Blender for video/animation purposes. It is significantly different from the game engine API, but also full of possibilities.

These first ones I am sharing are simple uses of Blender API for tasks like creating objects, linear animations, editing animation curves, triggering the rendering process, and dealing with event handlers.

1- super simple

2- fun with rotation matrix

3- editing animation curves

4- event handlers, animating a ‘swarm’

In future, I will share some more.

Collisions :: GameDev Unity3D cookbook

Detect collisions between objects is crucial to any game.
The game engines, always have some collision detection mechanism, and this topic is important to take in account before choose the game engine for your project.

The basic points to watch carefully are:
– How to set the collision detection;
– which basic geometric forms available for colliders(spheres, cudes, planes …) are available;
– If the game engine, support 3D mesh collisions.

When collision are detect, in general, event messages are sent through the system. And those event must be “captured” by some game object, in order to execute game routines, that will provide the game dynamics.

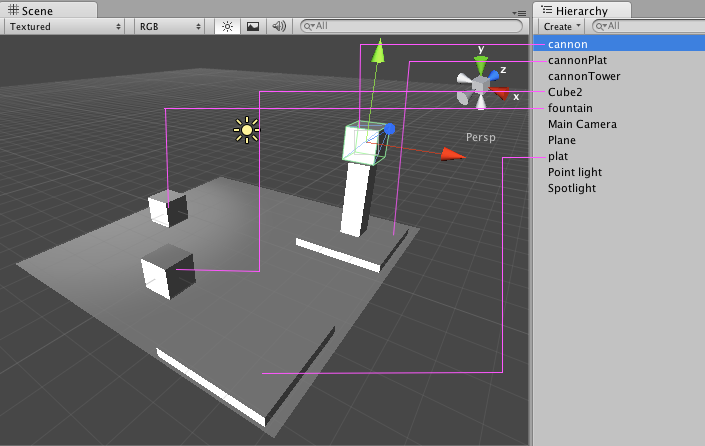
For these tutorial, create a scene, as shown in the image bellow:
CenaCollisions

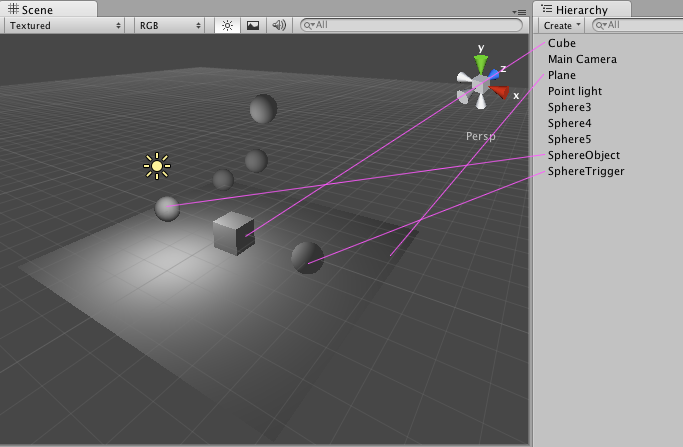
Attention: In this tutorial I will use the names for the game objects, as the image indicates.

On Unity3D, collision detections are performed by the physics engine, so, the elements for setup your collision can be found in the Componet >> Physics menu, which are Colliders and Rigidbody.

Let’s configure the basic elements to the game objects:
Object SphereTrigger:
– check if it has the component SphereCollider, if positive, check the trigger option. If the sphereCollider is not present, you must include it. go to menu Component >> Physics >> Sphere Collider. Than, check it as trigger.

Object SphereObject:
– Check if the component SphereCollider is present, and uncheck the option “is Trigger”.
– Add a Rigidbody component, if needed (To add the rigidbody, go to menu Component >> Physics >> Rigidbody) . And uncheck the option “Is Kinematic”.

Object Cube:
– Check if it has the Box Collider component, and the “is Trigger” option, unchecked.
– Add the Rigidbody component. To add the rigidbody, go to menu Component >> Physics >> Rigidbody. And check the option “Is Kinematic” – that will allow us to move the object without physics simulations.
– Add the BasicInputHandlerCube script (shown in the user input tutorial).
– Add the BasicCollisionHandlerCube script that you can see bellow:

BasicCollisionHandlerCube:
[code lang=”java”]
private var colisionInfo:String = “Collision info”;

function Update () {
}

function OnCollisionEnter(col : Collision){
colisionInfo = “Collision Enter (Rigidbody) : “;
}

function OnCollisionExit(col : Collision){
colisionInfo = “Collision Exit (Rigidbody) : “;
}

function OnTriggerEnter(col : Collider){
colisionInfo = “Collision Enter (Trigger) : “;
}

function OnTriggerExit(col : Collider){
colisionInfo = “Collision Exit (Trigger) : “;
}

function OnTriggerStay(col : Collider){
colisionInfo = “Collision Stay (Trigger) : “;
}

function OnGUI(){
GUI.Label(Rect(200,75,300,100),colisionInfo);
}
[/code]

This demo is very simple. It will show a message in the screen, about the collision nature. The BasicCollisionHandlerCube script changes the value of the colisionInfo variable, according the collision events, and than it prints the collisionInfo variable on the GUI.

The Unity3D, uses it’s physics engine to calculate the collisions, and the colliders (BoxCollider and SphereCollider components) are the sensors used to detect when one collider touch another collider.
When a collision is detect, the Rigidboby component, is informed, and sends an event message to the game object components according the collision’s nature. If one of the colliders were a trigger it sends the messages OnTriggerEnter, OnTriggerStay, and OnTriggerExit. Otherwise the rigidbody send the messages OnCollisionEnter, OnCollisionStay, and OnCollisionExit.
In this example, when the Cube collides with SphereTrigger, the message OnTriggerEnter, is sent when the collision starts; the message OnTriggerStay, is sent while the objects are colliding; the message OnTriggerExit, is sent once the objects stop colliding.
The same thing happens when the Cube collides with the SphereCollider, but in this case the messages are OnCollisionEnter, OnCollisionStay, and OnCollisionExit, because in this collision none of the colliders are set as triggers.

Check the final sample here.

What do you do with the other spheres?? Have fun!! Set their properties as you want, check how they behave in collisions, try to experiment some scripts… explore!!

Messages :: Gamedev Unity3D cookbook

There are two possible ways to send event messages through game objects on Unity3D: 1 – Send messages to linked objects; 2 – Search for objects on scene, and execute components functions.

Messages
First, let’s see the how to send messagens to linked objects, using Send Message, BroadcastMessage, and SendMessageUpwards.
You shall create a scene with basic elements as described in the image bellow:
imagemCenaMessages
Attention: Use cube elements as shown in the image, use the same names. The fountain, and cannon objects, must have a EllipsoidParticleEmitter, a ParticleRender and a ParticleAnimator, set them as you want.
Attention 2.: In object Cube2, add the BasicInputHandler script, we explored in User Input tutorial.

SendMessage
The method SendMessage will execute a certain function, in any object componen which has the function.

Preparation: In fountain object, set it’s BoxCollider Component as a trigger. Create these two scripts, and drag them to the fountain gameObject.

FountainScript:
[code lang=”java”]
function Update () {
}

function TurnFountainOn( v: boolean){
particleEmitter.emit = v;
}
[/code]

SendSimpleMessageScript:
[code lang=”java”]
function Update () {
}

function OnTriggerEnter(col: Collider){
this.SendMessage(“TurnFountainOn”, true);
}

function OnTriggerExit(col: Collider){
this.SendMessage(“TurnFountainOn”, false);
}
[/code]

The SendSimpleMessageScript will detect collisions, and send the message “TurnFountainOn”, along with the boolean value true or false.
the FountainScript, has the function TurnFountainOn, which will turn the particles on, according the argument recieved:true or false.
See the docs here.

BroadcastMessage
The Method BroadcastMessage will do the same job as SendMessage, but with the possibility to send the message to other game object, as far as they are perental linked, the messages are send to the sender’s children objects.

Preparation: Make the cannon object, child of cannonPlat object (use the panel for that).
Make the FountainScript component of cannon object.
Set the cannonPlat’s BoxCollider as trigger.

Crie um novo script, BroadcastMessageScript:
[code lang=”java”]
function Update () {
}

function OnTriggerEnter(col: Collider){
this.BroadcastMessage(“TurnFountainOn”, true);
}

function OnTriggerExit(col: Collider){
this.BroadcastMessage(“TurnFountainOn”, false);
}
[/code]

As soon as the SendSimpleMessageScript detect collisons, it broadcasts the message TurnFountainOn, to all it’s children objects, and the ones who have the TurnFountaiOn function, can perform actions.

Find Component
Any gameObject on Unity3D can execute the function Find, that will search for gameObjects over the scene. From this search, it´s possible to call for functions on the gameObject found.

Preparation: Set the plat’s BoxCollider as a trigger. Make the FountainScript a component of cannon object.

Create the following script, FindBehaviorScript:
[code lang=”java”]
function Update () {
}

function OnTriggerEnter(col: Collider){
GameObject.Find(“cannon”).GetComponent(“FountainScript”).TurnFountainOn(true);
GameObject.Find(“fountain”).GetComponent(“FountainScript”).TurnFountainOn(true);
}

function OnTriggerExit(col: Collider){
GameObject.Find(“cannon”).GetComponent(“FountainScript”).TurnFountainOn(false);
GameObject.Find(“fountain”).GetComponent(“FountainScript”).TurnFountainOn(false);
}
[/code]

Make the FindBehaviorScript, component of plat object.
Just like the previous scripts, this script will detect collisions, and than search for the cannon and fountain objects. When the object is located, we can access it’s components, and execute their functions.
See the docs for this procedures.

Take aa look to the final sample.

Blender Game Engine Course – class 5

In this videos (portuguese only), we begin a pratical usage of Python scripts controlling BlenderGE API itens.

Topics:
– Python scripts
– Controllers Python and AND
– Sensors: Collision, Property, Always.
– Actuators: Motion, Property
– Catch objects in scene, via script.
– Usign alignAxisToVect function
– Vectors subtraction.

Blender Game Engine Course – class 3

Video topics (in portuguese):
– Introduction for collision detection, and physics elements – Object’s Physics Properties – Collision Sensors – Visibility, and Property Actuators;
– Collision detection compatibilities among certain physics properties;
– Object’s properties;
– Physics Visualizations;
– Debug Properties Visualizations;